Hey, I am Avery. I am grateful to those making social networking sites as the social networking sites help us connect with more and more people worldwide. I share my ideas on how social networking sites influence our present-day generation and how you can take advantage of these to grow digitally. I impart my views on social networking sites.
webroot.com/safewebroot.com/safe
While using our computer systems and mobile devices, we browse multiple websites daily. In fact, for most of us, this is the daily routine. But opening the websites one by one is surely time-consuming. And sometimes, we even tend to miss out on some web pages now and then. So, don’t you think that it would be great if you can just open multiple web pages with a single shortcut? Well, of course, it would be great for anyone. And luckily, Windows 10 operating system allows you to browse multiple web pages simultaneously with a single shortcut. You can do so by creating a quick desktop shortcut. Windows 10 has always been known as the most customizable operating system as it enables you to personalize settings on your computer as per your preferences.
And if you want to browse multiple websites simultaneously on your Windows 10 computer, you can do so with much ease. To get the method for this, you must read the complete post. Here, you will have to create a shortcut file for accessing the multiple sites on your Windows 10 PC. So, please read the blog to have a clear idea of the task.
Method to Open Multiple Websites With a Shortcut on Windows 10
There are multiple ways through which you can open multiple websites at once on your Windows 10 computer. You can do so by creating a desktop shortcut or directly from your internet browser. And the first method seems so simple that anyone can easily follow. Here, we will show you the first method, which is opening multiple websites on Windows 10 using a desktop shortcut. So, let’s see how any Windows 10 users can create a desktop shortcut to open multiple websites at once.
Steps to Browse Multiple Websites With a Shortcut on Windows 10
Follow the below-mentioned steps to browse multiple websites with a shortcut on Windows 10:
To get started, firstly, you will have to create a new text document on your desktop. You can name it something like “Important Sites.txt.”
Double-click on the document to open it for editing.
And now, you will need to copy and paste the following code:
You can mention any website’s name in the code that you want to open.
After entering the code, you can save the file and rename it. And that’s it. Now, to open all these sites at once, all you will need to do is double-click on the file. And all of these sites will be opened in your default browser in tabs.
So, this is how any Windows 10 user can open multiple websites at once on their computer system. You can try the method at any time you want. And also, share this useful information with your friends. Keep visiting our official website to know more.
Windows Photo Viewer offers you to print straight through the application. But a few times, when you provide the print job, you face the ‘Windows Photo Viewer, not printing’ problem. So, if you are facing a similar issue, then here are the instructions provided below.
Extracting the Zip File Before Printing to Fix Windows Photo Viewer not Printing Issue
Extract the zip file before printing by pursuing through the under-written directions:-
If you attempt to print through a zip file without extracting the file, maybe you should not be capable of printing.
Then select the zip file, and right-click on it, then choose the Extract button.
You should launch the extracted folder of extracted.
After that, invoke the image in Windows Photo Viewer.
Now, attempt printing the image and look for any improvements.
Set the Default Printer to Fix Windows Photo Viewer not Printing Issue
Set the default printer by pursuing the directions given below.
Hold the Windows and R buttons altogether over the keyboard to invoke the Run section.
After that, input ‘control’ into it and select the OK button to invoke the Control Panel.
You should reach the Hardware and Sound option.
Go to the ‘Devices and Printers,’ click on it.
Reach the installed printers list and right-click on the desired Printer.
You have to choose the option of ‘Set it as a default printer.’
Now, shut the Control Panel screen.
Finally, invoke the application of Photo Viewer and look at whether you should print now.
Perform Printer Troubleshooter to Fix Windows Photo Viewer not Printing Issue
Perform printer troubleshooting by pursuing the under-written directions.
You should select the Start menu and click on Settings.
After that, choose the ‘Updates and Security.’
Then move down and select the Printer option.
You have to choose ‘Run the Troubleshooter.’
After that, pursue the on-screen steps and save the suggested fixes.
Now, shut the troubleshooter, then look for any improvements.
Add the Printer Again to Fix Windows Photo Viewer not Printing Issue
Add the Printer again by pursuing the directions given below.
You have to reach the Start menu and choose the Settings option.
Then select the Devices option.
Go to the ‘Printers and Scanners’ option.
After that, select the button ‘Add a printer or scanner.’
Don’t forget to connect the Printer to the system.
Later, choose the Printer through the list once you detect and on-screen steps to finish the setup.
Now, invoke the application of Windows Photo Viewer and look for any improvements.
Set Windows Photo Viewer as Standard to Fix Windows Photo Viewer not Printing Issue
Set Windows Photo Viewer as standard by pursuing the under-written directions:
Go to the Start menu on your system.
Then choose the Settings option.
You should select ‘Default apps.’
After that, move down to the Photo viewer.
Navigate to ‘Choose a default.’
Later, move through the applications, then choose the Windows Photo Viewer through the list.
Now, shut the Settings screen and look for any improvements.
Windows Photo Viewer may fail to print your documents for various reasons, including app-related and printer issues. Take help from these fixes mentioned above and resolve them.
Minecraft is one of the best sandbox games in gaming history provided by Mojang. It allows you to personalize and create the assets, gameplay mechanics, and items. It’s a multiplayer game and offers many new gaming challenges. If you would like all the latest Minecraft content, then you will have to update Minecraft. So, if you would like to update the Minecraft Windows 10 edition, then here are the directions given below.
Upgrade Minecraft with the Microsoft Store Application
If you are willing to upgrade Minecraft with the Microsoft Store application, you can go through the under-written directions.
You should select the Microsoft Store shortcut.
After that, select the ‘See more’ option on the upper right side of the application MS Store.
Go to the menu and select the ‘Downloads and updates’ option.
After that, you will see Minecraft in the download section.
Otherwise, select the ‘Check for updates.’
Choose the Option of Force Update
The users who are keen to choose the force update option can pursue the directions given below.
Firstly, invoke the screen of ‘Minecraft Launcher.’
After that, select the button of Options.
You should choose ‘Force update.’
Later, select the Login option to upgrade the game.
Now, hold the Done button.
Install the Application of Minecraft UWP Again
Suppose you are willing to install the application of Minecraft UWP again, then follow the under-written directions. If you have already tried this resolution, then continue further to the next solution.
To install the application of Minecraft again, select the Windows 10 button of ‘Type here to search.’
After that, input uninstall apps into it and select the OK button.
You should choose the ‘Apps and Features option to invoke the Settings application.
Then choose the Minecraft application.
Afterward, hit the Uninstall button to delete it.
Later, reboot the system before installing Minecraft again.
Finally, select the Get option on Minecraft’s Microsoft Store page to install the newest version again.
Install Minecraft: Java Edition
If you want to install Minecraft: Java Edition, you can determine to pursue the directions given below.
Hold the Windows and R altogether over the keyboard to invoke the Run section.
After that, insert ‘appwiz.cpl’ into it and select the OK button.
Go to the applet of ‘Programs and Features’ and choose the Minecraft option.
You should select the Uninstall option to delete Minecraft.
If you can’t locate the Minecraft shown in the Programs and Features section, invoke the File Explorer.
Then insert ‘%appdata%’ into the File Explorer to invoke the folder of Roaming.
After that, reach the Minecraft folder and right-click on it, then choose the Delete button.
Later, reboot the system once you uninstall the game.
Invoke the Minecraft Launcher.
Now, sign in to Minecraft.
Finally, select the button of Play to install the newest version of Minecraft.
Repair Minecraft not Upgrading
If you want to repair Minecraft, not upgrading, then go through the under-written directions. If you have already tried this resolution, then continue further to the next solution.
Invoke the search tool.
After that, input ‘updates’ into the search section.
You should select the ‘Check for updates’ to open the Settings.
Then click on the ‘Check for updates,’ download the awaiting updates.
If you see any updates, then select the ‘Download and Install’ option.
Later, select the Advanced Options, then choose the button of Reset.
Now, click on the Reset button once more to verify.
Do you own an Android smartphone and are tired of using tedious touch controls to interact with your device? Using an Android device is pretty easy for anyone as it has a user-friendly UI.
All Android devices come with various excellent features that anyone can easily access to have the best experience. Google releases updates for Android from time to time to improvise the users’ experience.
And recently, the Android 12 Beta version has been made available to download for all users. Google has added many new options within this upgraded Android version, including scrolling screenshot support, one-handed mode, and unique customization and privacy capabilities. Along with this, one can now even control their device with just their facial expressions.
Do you want to know how to do so? Want to see how you can interact with your Android smartphone with your facial expressions? If you have already downloaded the Android 12 beta version on your device and want to see how you can control it with your facial expressions, you have now come to the right page.
The following article will show the method following which you will activate the option to control your Android smartphone with your facial expressions. So, keep reading the post to get full details.
All About Controlling Android Smartphone Using Facial Expressions
Android 12 includes a feature that enables users to control their device using facial expressions such as smiling, raising eyebrows, and eye movement. Google already offers many accessibility features to Android users, like voice access for touchless control, action blocks for quickly performing a specific task, support for hearing aids, and live transcription.
These accessibility options are either baked in at the OS level as part of the Android accessibility suite or made available in third-party dedicated apps. Support for the facial gestures is a significant update to switch access in Android 12.
To control your Android smartphone with your facial gestures, you will have to use your device’s built-in camera app. If you want to try this new feature right away, make sure that you have updated the Android version on your device.
And then, you will have to follow a method to enable the functionality. For this purpose, here, we have mentioned a helpful step-by-step guide that you will need to follow.
So, without further discussion, let’s see what you will need to do to control your Android smartphone with your facial expressions.
Instructions to Setup Camera Switches Accessibility Service
Here are the steps following which you can set up the camera switches accessibility service on your Android device:
First of all, go to the Settings screen on your device and then tap on the option of “Accessibility” to navigate to the Accessibility Settings page.
Now, go to the “Interaction Controls” menu and tap on the option of “Switch Access.”
After this, turn on the toggle button for the “Use Switch Access” option, after which you will see a pop-up on your screen requesting complete control of your device.
You will have to grant permission by tapping on the “Allow” button to set up the feature.
After enabling the switch access, you will see the option to choose a switch type and number of switches. You will have to pick “Camera Switch” as the switch type.
You will now have to pick how the switch access should scan the contents on your screen. For this, you will be provided with the options, including Linear scanning, Row-column scanning, and Group selection. You can select any of them.
And now, tap on the “Next” button located in the bottom right corner of the screen.
At last, pick any of the facial gestures that you would like to use. For instance, you can set up the smile gesture to open the quick settings panel.
And in the same way, you can assign gestures to other actions as well.
That’s it. Now you can use the selected expression to interact with your Android device.
So, this is how you can interact with your Android smartphone using your facial expressions. And this is all for now. Keep visiting our official website to stay updated.
Are you one of them who likes to use the VLC Media player on all of their smart devices? Now wondering how you can install this media player software on your new Amazon Fire TV Stick? Well, there is no doubt that the VLC media player is much popular media player software that is used by a large section of people all over the world. This great software hardly needs an introduction as many people are pretty familiar with it. The majority of people on all platforms, including iOS, Android, macOS, Windows, Unix, and Linux prefer to use the VLC media player for playing any media files. VLC is pretty easy to install and use on any device. And the best part about using this media player software is that it is entirely free of cost and it supports all file formats, including MPEG, MKV, WebM, WMV, MP3, and all other file formats.
For installing and using the VLC Media Player on an Android or iOS device, one needs to go through the Google Play Store or App Store. And if you want to install the software on a computer system, you will have to go to its website. But how can you install the software on a Fire TV Stick? Do you know how to get this media player software for your Fire TV device? Well, if you don’t know, there is no need to worry at all. We are here to show you the procedure through which you can easily install the VLC Media Player on your Fire TV Stick. And to see the method, you must keep reading the post.
Procedure to Install the VLC Media Player on Amazon Fire TV Stick
Anyone can easily install the VLC Media Player software on an Amazon Fire TV Stick device. It follows a pretty simple procedure that includes some easy steps. You can get the software from the Amazon App Store. Or you can even sideload it using the Downloader app. And here, we have explained the task in a much straightforward manner. So, let’s see how you can get the VLC Media Player software for your Amazon Fire TV Stick device.
Steps to Install the VLC Media Player Software on Amazon Fire TV Stick
Follow the below-mentioned steps to get started with the task of installing the VLC media player on the Amazon Fire TV Stick device:
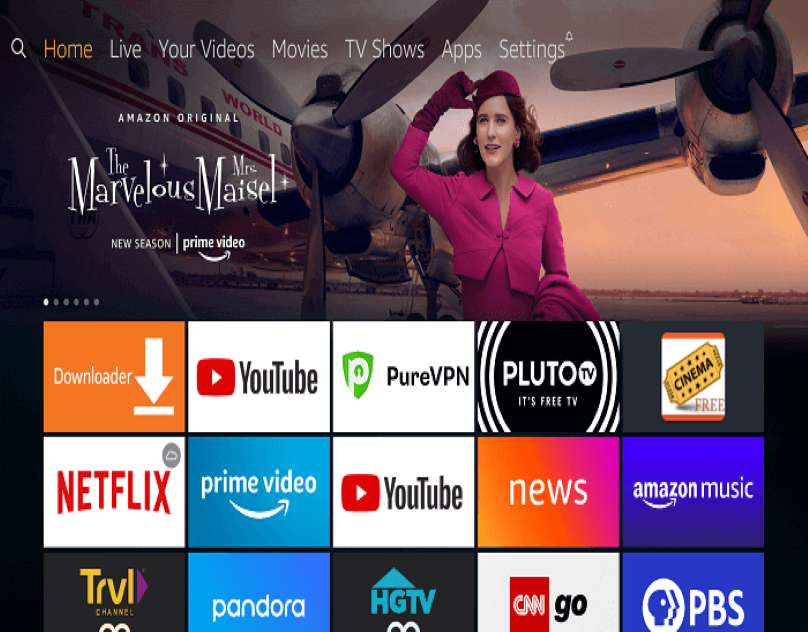
First of all, you will need to turn on your smart television and then navigate to the Fire TV Stick home screen.
On reaching the Home screen, navigate to the Find menu section and then click on the search icon.
Now, you will have to use the virtual keyboard to search for the VLC Media Player software. Alternatively, you can use Alexa to search for the VLC player.
From the appearing results on your screen, you will have to select the VLC app and then click on the option of “Get” from the menu.
And then, you will have to wait for a few minutes until the app gets completely downloaded. And once the app gets downloaded on your Fire TV Stick, you can start using it to play your media files. Now, you can open the app from the App menu.
So, that is how anyone can install the VLC media player on their Amazon Fire TV Stick device. And that’s it for now. Try the method and let us know if you face any issues. To read more articles like this, please take a tour of our website.
A new report has been released, and it has quickly reached the list of Google Trends. It suggests that the tech companies based in the United States of America have done a tremendous job in recent times to restrict the shadow IT from growing.
It has been reported that many respondents based in the United States of America have decided not to work from office for the following two years. However, there is a deep concern among various IT companies regarding the employees’ strategies regarding their cyber safety. And how they are implementing them and are planning to implement them.
Since March 2019, nearly every industry has been seeing a large section of its employees operating from their homes in today’s time. However, security is a significant factor in the tech industry and in the sectors where there is a concern regarding the amount and sensitivity of data. Therefore, there is an internal debate in many companies on how to proceed with this remote-work norm.
Ever since COVID 19 dominated the world, both large and small companies proceeded towards work from home to alleviate the spread of coronavirus. A direct consequence of this was the increase in security risks.
All the employees using security systems and secure networks a day before are now using their PCs and home networks. All the cyber attackers realized this, and the world saw an unprecedented increase in the number of cybercrimes happening every day.
And now, a survey called Digital Readiness survey conducted by ManageEngine was initiated. The results were soon declared, and ManageEngine posted them on their website. The survey primarily focused on several key points, including cybersecurity planning, mitigating Shadow IT, network risks, and much more.
ManageEngine also released a press release for the public, and it is available on the internet. The chief evangelist of the ManageEngine company, Ajay Kumar, also made a statement regarding the shift in the workplace dynamics. He revealed that the survey results infer that there has been a sudden shift in cybersecurity practices, and the pandemic has forced the companies to re-strategize these practices.
Work from Home and Cybersecurity Problems (Shadow IT)
In the survey, ManageEngine found that over 80 percent (nearly 81 percent) of the working professionals in the United States of America believe that working away from the office has decreased their data security. Using low-cost networks and non-secure systems has increased the chances of cyberattacks while working remotely.
Suppose we further dig into the press release. In that case, we will find nearly 91 percent of the companies in the United States have implemented measures to better the security of the employees working from their homes.
Some of the common measures taken by all companies include individual awareness, security training, and company device monitoring. An interview was given by a Webroot employee back in February also stated that companies need to ensure that their employees are refraining from visiting websites, which are not secure.
Antivirus companies such as Webroot have always stressed that knowledge and awareness of the viewers play a crucial role in cybersecurity.
The report given by ManageEngine has put stress on the typical cyberattacks and also suggested a few measures. ManageEngine also provided comparisons and gave regions factors, which also determine the security of the system. Some of the common types of cyberattacks include malware, phishing, and endpoint network attacks.
In January, many MNCs and small companies were planning about reopening offices and calling their employees. However, they postponed their decision and refrained from issuing any guidelines after the news regarding the delta variant came around.
Now, companies are working to find solutions to make remote work more feasible. They are working towards creating a commitment to remote work and making it as secure as possible.
In the report, ManageEngine has stated that the professionals (nearly 96 percent) plan to work remotely for the next couple of years.
Consequently, many renowned companies in the US have adopted a more flexible approach to cybersecurity. They are implementing every solution and leaving no stone unturned to make their employees’ devices as secure as possible.
The survey found that the companies in the United States refrain from employing antiviruses that are not trustworthy. Only about 19 percent of the companies use low-trust cybersecurity programs. It is significant when you realize that companies in South Asian countries such as India have around 49. Even when you consider it globally, the percentage rises to 33.
What is Shadow IT?
As the name suggests, the term “Shadow IT” refers to the use of IT programs, applications, or devices without pre-requisite approval from the IT department. If an employee uses any programs or system for official work without permission from the company’s IT department, it is called “Shadow IT.”
Restricting the use of “Shadow IT” means that the US companies are stringent in regulating the use of devices and programs for the official task. It shows the vigilance and monitoring of the companies based in the US.
As per the statistics released by ManageEngine, the US companies have mitigated the use of “Shadow IT” and are excelling at 33 percent. They are fairing at ten times more than companies based in other continents. This is more true for the companies in North America as the executive spoke at length about “Shadow IT” to ManageEngine.
Conclusion The survey conducted by ManageEngine could prove to be an awareness call for all companies around the world. They need to investigate further the use of “Shadow IT” Furthermore, the help of unified endpoint control measures, employee training, and identity and access management should be appreciated.
It is a new and improved game pass. You will get over 100 titles per month that you can play on Xbox One, Xbox series X, and PC. You can also play it on your phone. It contains first-party games. However, they also edit third-party titles. You also have the option to choose between the normal tier, which includes PC or Console. Any Xbox console you own comes under the Console section.
Console Pass
For the Console, you can get it for $9.99 per month. It will renew automatically. If you do not want to go on, then you can also cancel your subscription, at any time. You can also join on Xbox or Amazon, or the Xbox game store. It will get you access to 100 plus Console games. You will also get newly added games all the time. You will also get discounts and deals.
PC Pass
It will cost you about $10 per month. You can get all the services like Console pass. In other words, you can access games for PC, and various discounts. However, it is slightly different from the Console pass. Some games are not available for the PC version, and some games are PC exclusive only.
If you get the subscription for the PC then you will also get the EA subscription service automatically. As a result, you can play tons of EA games.
Ultimate Pass
If you love gaming on both the PC and Console, then this service is great for you. It gives you a game pass on the Xbox console as well as on PC. You will additionally get Xbox live Gold. In other words, you can play it online with your friends and chat with them.
Games with the Gold service are the most important games. You will get newly added games on the Xbox Gold service. It will cost you $14.99 per month.
Sign-Up
If you sign up for this service, then you will have to pay $1 for the first month. This offer is for promotion only. You can play and try the service, and if you like it, then you can keep the subscription. You will be able to play on your console and PC.
Browse By Category
You can browse the games by category. It also includes Platformer, Classics, Racing & Flying, Indies, Shooter, Fighting, Action & Adventure, and Family & Kids. Some of these categories are for PC only.
Xcloud
You can also play these games on Xcloud. You will only need a supported device. In other words, you can play it on any Windows tablet or Android smartphone. You can play games with the game pass application.
Game Pass Page
You can see the benefits of your Xbox pass in this section. This section will show you the featured games, perks, and deals. You can also search for game titles. It also has picks based on your gameplay. It will also suggest new games to you. There are a lot of different sections, which include the Most popular, EA games, Gold Games, and much more.
Conclusion
Xbox Ultimate Game Pass gives you services like Game pass console, game pass PC, EA play, Xbox Live Gold, as well as discounts and offers. Microsoft is on top of providing gaming services.